How to enjoy your Youth Lab At-Home Facial Pack
Pamper yourself at home and maintain healthy, glowing skin. Our signature Youth Lab at-home facials are gentle enough to be performed up to twice per week. They assist in maintaining healthy cellular turnover, exfoliation and a deep cleanse in between your regular in-clinic treatments.
Tailored to your unique skin concerns and utilizing some of Youth Lab’s most popular products, these facials are a touch of luxury at home.
A few simple steps to beautiful skin (and a relaxing moment to yourself).

Step One: Oil Pre-Cleanse
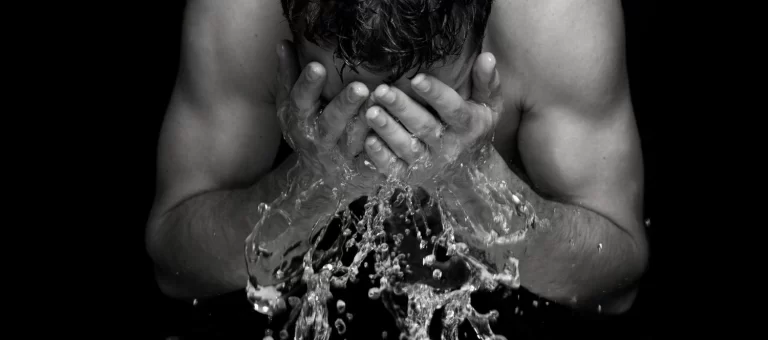
A must-do step at the end of every day and before any at-home facial is the pre-cleanse. Your facial pack contains the Cosmedix Purity Solution Nourishing Deep Cleansing Oil, which is designed to help melt away and remove makeup. This step will break down even waterproof and stage makeup, sunscreens, uneven or excessive oil flow and build-up of pollution and environmental factors from the day. Do not use this product directly over eyelash extensions.
To use, gently massage a coin-sized amount onto dry skin with dry hands. Emulsify by adding a small amount of water and massaging with your fingertips. The product will transition to a milky texture. Rinse thoroughly to clean and fully remove.
Step Two: Cleanse
Cosmedix Purity Clean Exfoliating Cleanser is a concentrated exfoliating cleanser containing a refreshing blend of Lactic acid, Tea Tree and Peppermint. This is a necessary part of facial preparation to prepare the skin for treatment.
Apply a coin-sized amount into the palms and add water to lightly foam the product in the hands. Massage onto the face using circular motions to thoroughly cleanse, avoiding the eyes. Rinse thoroughly, and finish by sweeping face with a damp cloth to remove residue.
A double cleanse like this will remove any excess makeup or sunscreen leaving the skin ready for the active Enzyme Elixir mask which will deliver botanical antioxidants into the skin.
Double cleansing is always recommended as part of your daily night routine to remove the day, not only will this ensure the skin is further prepared for better absorbing your active night products which follow, but it properly breaks down and removes daily debris which can be responsible for congestion.
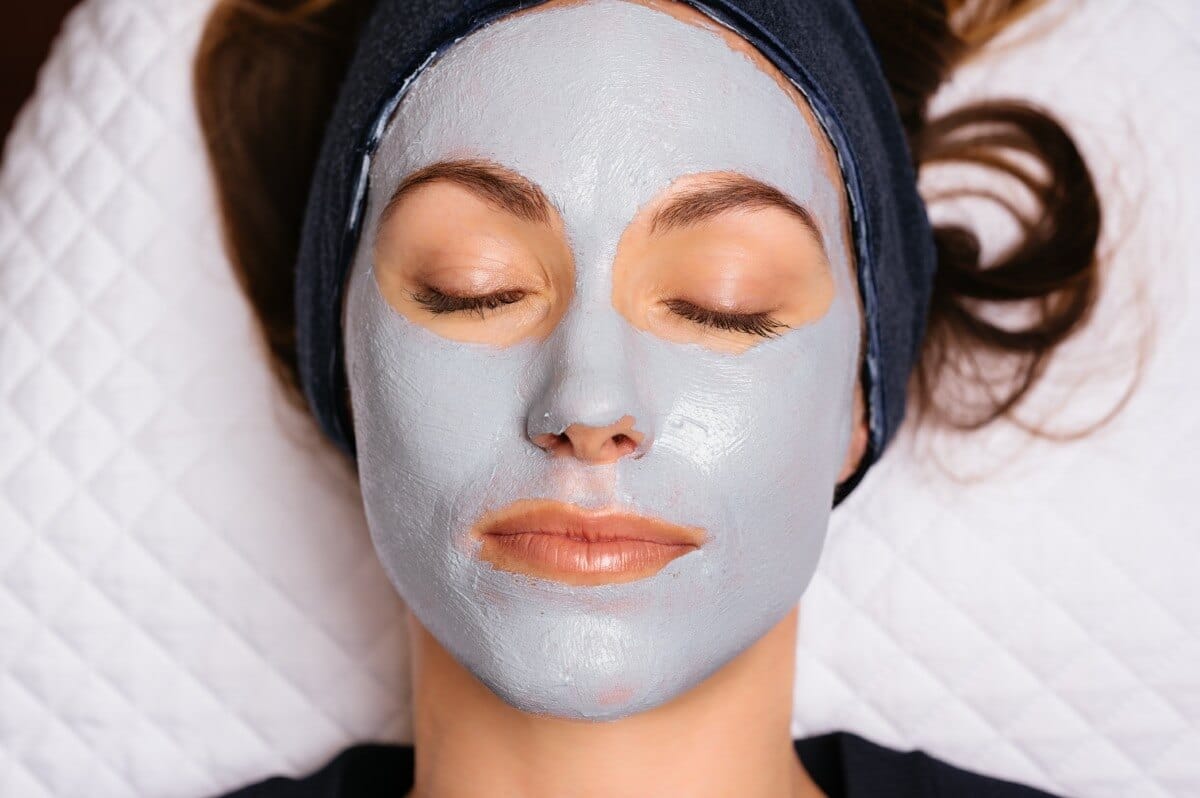
Step Three – Enzyme Elixir Mask
This invigorating exfoliating gel mask is an experience on it’s own! We use powerful active fruit enzymes from pomegranate, pineapple and acai berry to smooth the skin texture, as well as powerful vitamin complexes (containing vitamins A, B and C) to increase radiance.
Apply 1-2 fingertip-sized amounts of the mask onto dry skin. Gently massage the mask into the skin until the gel warms, and begins to turn into a liquid, continue massaging. You will feel your skin come away forming satisfying balls, much like after a peel. This process takes around 5 minutes.
*If your skin is very sensitive then simply just apply the mask; do not massage and continue below.
Once the mask has liquefied, relax for up to 10 minutes. This ensures the penetration of the active vitamins and enzymes and will help to further remove lifeless skin cells, revealing a brightened complexion. Once you are feeling relaxed, simply remove the mask with warm water and pat the skin dry.
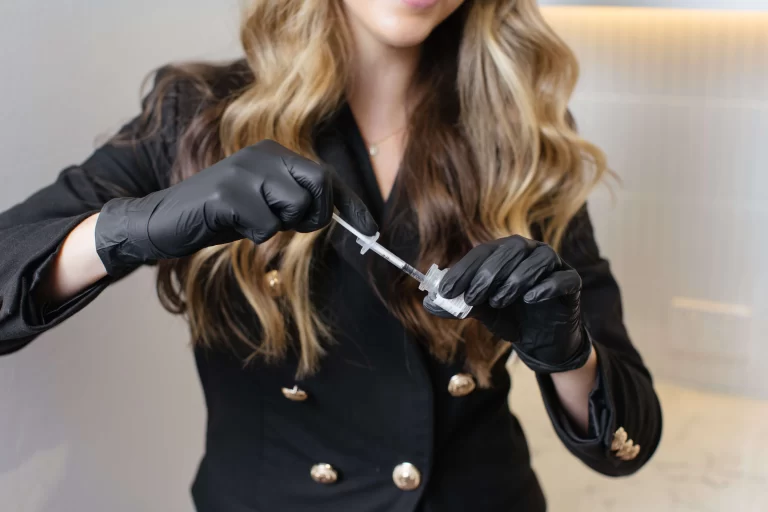
Step Four – Treatment Ampoule
Once the skin has been thoroughly prepared by the Enzyme Elixir, it is time to apply the Treatment Ampoule. Each ampoule has been selected based on its powerful blend of antioxidants and active ingredients.
Application: Snap the top off the ampoule at the yellow line gently.
Slowly drop the contents into your fingertips and massage continuously into the skin using circular movements. Ensure you have covered the forehead, cheeks, upper lip, nose, chin and down the neck and decollete.
Each ampoule is listed below:
Detox – Mesoesthetic Glycolic E + F: Glycolic acid, vitamins E and F for a deep exfoliating solution which accelerates cell renewal to reduce imperfections and stimulate healing.
Brightening – Mesoesthetic Pollution Defence: A protective antioxidant and anti-pollution solution to target melanin production pathways. This brightens discolouration and adds vibrancy to the skin.
Revitalise – Mesoesthetic Anti Aging Flash: Anti-wrinkle and anti-fatigue solution to prove the skin with an immediate lifting and firming effect. The blend of antioxidants reduces cellular damage and aging of the skin.
Hydration – Mesoesthetic Proteoglycans: Contains a high concentration of Vitamin C, Vitamin F and Glycerin moisturizing, nourishing, and repairing antioxidants to deeply restore and nourish the skin.
Step Five: Facial Massage & Antioxidant Infusion
To further revitalise the skin, we have included our top massage cream with a Gua Sha stone massage tool. This assists in further infusing our ampoule actives, stimulating blood flow and transporting nutrients to the skin, defining facial contours and encouraging lymphatic drainage for the ultimate glow. It also has the added benefit of easing facial muscle tension!
Our silky facial massage cream is specially formulated to act as a vehicle enhancing the delivery of our active ampoules. Containing a luxurious blend of hydrating and regenerating glycerin, balancing citric antioxidants and organic silica for its oil balancing and astringent properties, the cream provides the perfect ‘slip and glide’ over the skin.
Prepare the facial massage cream by taking two large coin sizes of the product in the palm of your hand, warm slightly by rubbing your hands together, and then spread the product over your face and neck.
How to Gua Sha:
- Have a firm hold on your Gua Sha stone and move it over your skin with light to medium pressure at a flatter angle of about 15 degrees, firmer pressure may be applied in areas of tension such as along the neck, jawline and pressure points over the eyebrows.
- Repeat every stroke five times or more if you have time on your hands. Maintain a slow pace, wiggle, and massage your with the stone once you conclude each stroke.
Neck:
- Relax your neck region first; because much tension resides there. Handle the stone in a way that the notched edge faces down.
- Begin at the back of the neck and direct your strokes upwards until you get to the bone that sits at the skull’s base. Ensure that you wiggle and massage the stone after each stroke.
- Direct your hand towards the sides of your neck in a continuous upward motion until you touch the bones that rest behind your ears. Place the long edge of the stone downwards at this point, and continue to wiggle after each stroke.
- Move towards the front of your neck beginning at your collarbone until you get to the jaw using the long flat edge.
- Place the notched end of your stone upward at the middle of your neck and begin an upward stroke until you arrive at the chin bone. Continue each motion five times or more.
Jawline & Lower Face:
- Move towards the right area of your face with the stone’s notched side and begin to stroke from the chin to the jawline and then the ear. Ensure the middle of the notch hugs the jaw bone.
- Rub the stone’s long flat side across your cheek moving upwards to the cheek. Begin at the side of the lip and go upwards to the end just before reaching your ear.
Eyes & Upper Face
- Go towards your under-eye area placing the stone’s notched edge below the eye and near the top of the nose while facing upwards. Stoke outwards towards your upper cheek and hairline. Apply light pressure while stroking the under-eye area. Avoid strong pressure. For extra de-puffing, you can take each stroke to the hairline, down towards the ear lobe and then down the side of your neck.
- Apply the stone’s notched side over the head of your brow, so that the notch is across your eyebrow with one point below and one point just above the brow. Apply upwards pressure slightly lifting the brow and stroke the stone outward to the tail of your brow. For extra tension relief, you can apply pinch and lift pressure, bit by bit all along the brows.
- Begin at the eyebrow covered by the stone’s long side, use its flat side and direct your movement upward until you get to the top of your forehead.
- The next step is to use the stone’s short flat edge of the stone and begin at the point a little rightwards from the middle of your brows and then continue in an upward motion until you have covered the entire forehead.
Repeat the entire movement on the two sides of your face.
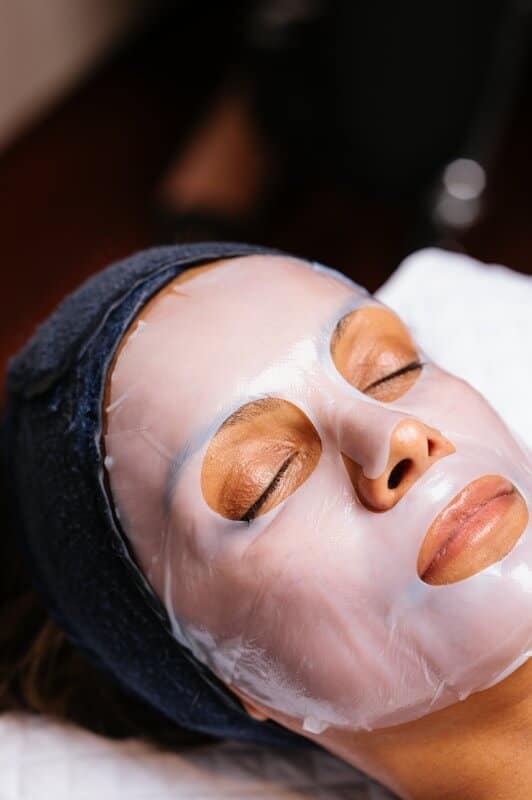
Step Six – Peptide Sheet Mask
This beautiful and soothing mask is one of our most popular add-ons in clinic. When added to the at-home facial experience, it enhances results by promoting healing, hydrating deeply, plus reducing redness, swelling and irritation.
Using a unique formulation of peptides, plant-based stem cells and great anti-aging ingredients, which help skin rejuvenation, these Peptide Gel Sheets incorporate an innovative technology called TCD (Transdermal Cosmetic Delivery), which ensures that their key ingredients are activated by skin temperature. Additionally, it rapidly minimizes dehydrated skin and improves the skin’s self-moisturizing ability.
Remove the mask from the packaging. There will separate lower face and upper face sections. Peel away the backing and apply each piece to the face. Gently smooth the mask until it lays smooth over the face and in position.
Now simply relax (cucumber slices for the eyes and an antioxidant tea optional, but encouraged!)
Let the skin absorb the antioxidants for a minimum of 15 minutes, however, as long as is possible is recommended.
TIP: Refrigerate your mask prior to application for an additional cooling effect.
Step Seven: Final Antioxidant Boost
Following your relaxing Peptide Mask, it is time to finish your targeted antioxidant boost with a final corrective serum application.
Each targetted corrective serum has been selected for each facial based on their powerful blend of active ingredients to amplify your results.
Application: Apply 2-3 drops to fingertips and gently pat the serum over your face to give even coverage. Feel free to massage the skin as you go. Your skin will feel slightly sticky after this step which is normal.
Each serum is described below:
Detox: SkinCeuticals Silymarin CF Vitamin C serum contains a blend of 15% l-ascoric acid and 0.5% Furulic acid for targeted healing, clarity and radiance. The Silyamin antioxidants are derived from Milk Thistle to neautralize oily blemish-prone skin types. This is the perfect vitamin C blend for blemish-prone skins who would otherwise not tolerate vitamin C.
Brightening – SkinCeuticals’ Phloretin CF Serum contains 2% phloretin, 10% L-ascorbic acid and 0.5% ferulic acid. These active ingredients are proven to reduce environmental damage and neutralise free radical damage from UV exposure. This in turn improves the appearance of discolouration and uneven skin tone, as well as visible signs of aging.
Revitalise – SkinCeuticals’ C E Ferulic is a high potency serum with a combination of 15% pure L-ascorbic acid, 1% vitamin E, and 0.5% ferulic acid to protect against environmental damage. This improves the appearance of fine lines and wrinkles, as well as the skin laxity that comes with age. This formula also brightens for more youthful complexion.
Hydration – Hydrating B5 Gel is an oil-free, hydrating serum containing a blend of Vitamin B5 and Hyaluronic Acid (HA). HA is the body’s natural hydrator, working to bind moisture to the skin, while stabilising and repairing barrier function. This serum works to deeply replenish the skin and improve its own natural moisturising ability.
Step 8: Moisturise
Complete your home facial by locking in your targeted antioxidants and treatment blends. To do this, apply your provided Skinceuticals Daily Moisturiser. This is a final touch to add further active ingredients and hydrate the skin.
Gently massage a pearl-sized amount over the face, neck and décolletage.
Optional Steps
Déesse Pro™ LED Mask
For those looking for the ultimate at-home facial treatment, adding an LED session between your Enzyme Elixir and Antioxidant Infusion is a must!
LED treatments are our best selling add-on in the Youth Lab clinics— and for good reason! LED Light therapy is well documented with clinically proven results. LED works by stimulating photobiomodulation.
Our skin cells absorb these specifically selected wavelengths and convert them into cellular energy to promote optimal cell function. If we have optimal cell function we to see improvements and changes which stimulate healing, repair, inflammation reduction and fibroblast production.
LED treatments are safe for any skin type and colour.